How to Integrate Instagram media to your Web App Using Facebook API & JS
Dependencies:
- Node.js / Astro.js ( if you don’t have node follow this guide to get it installed. Astro will be installed later in this artcile)
- Facebook developer account
- Access to an Instagram account
To create a web app that displays Instagram media posts, you can use AstroJS, a modern web framework that is easy to learn and use. Here are the steps:
-
First, you need to create an Facebook developer account and register your app to get an access token. You can follow the instructions provided in the official Facebook developer documentation to do this or follow along here.
-
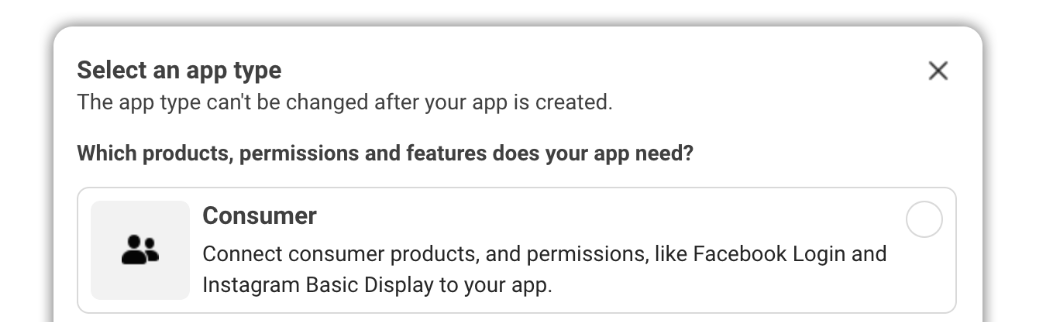
For Step 1 “Choosing an App Type” you choose the first option “Consumer”
-
Got to App Settings scroll down and “Add a Platform”. Choose website add the url if you don’t yet have a url add http://localhost:3000/. This is necessary, if you don’t add this facebook will not allow you to setup your instagram basic display app.
-
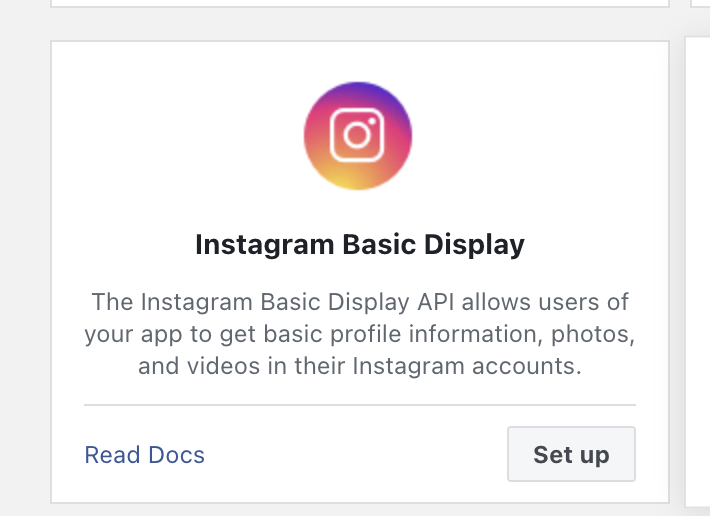
In the App Dashboard scroll down and choose “Instagram Basic Display”
-
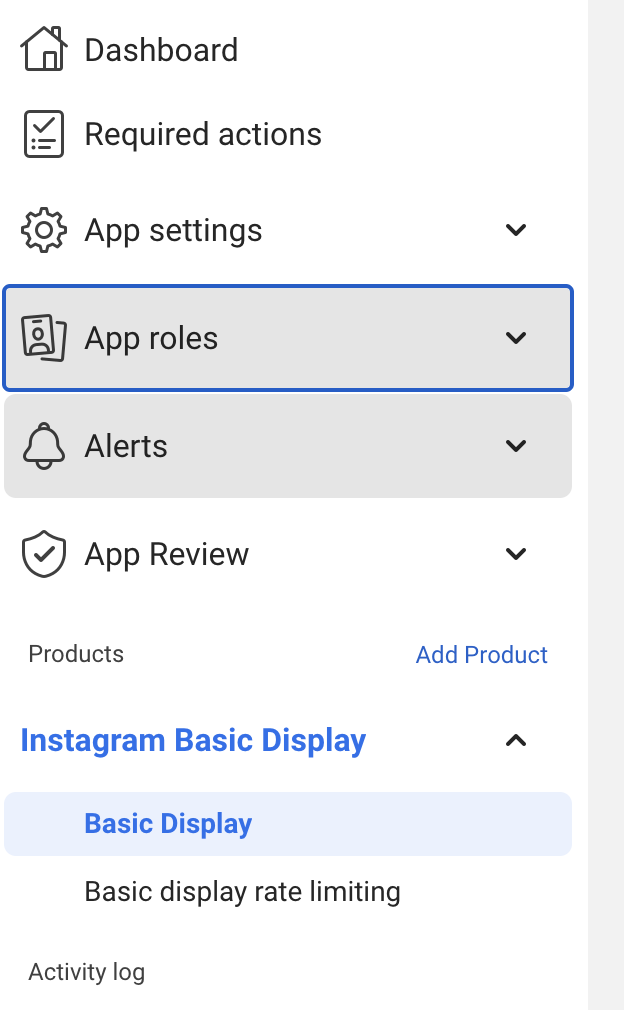
Next we will add a user in order to get API key navigate to “Instagram Basic Display” and click on “Basic Display”
In the page hit add Add or Remove Instagram Testers This will bring you to a new page where you can add a tester the last is the one you want titled “Instagram Tester”. Search the instagram user you would like to add. This is necessary in order to get a api key to query data from.
-
After adding the tester you will need to allow access through the “testers” instagram account go to Apps and Websites in settings of Instagram to allow access.
-
-
We now have the access token, you can use the Instagram Basic Display API to fetch media posts from your Instagram account. You can use any HTTP client library to make requests to the API endpoints.
- to keep this token safe we will be putting it into a .env file and adding it to our .gitignore file.
-
Next, we’ll setup the web app, if you haven’t used AstroJS follow the official AstroJS documentation to learn more about how to use the framework. But that is not needed for this everything you need to know I’ll describe below.
-
Now we can start coding navigate to a directory in your computer where you don’t mind creating a new folder
-
run
npm create astro@latestin your terminal- follow the prompts and I’ll see you on the other side
-
You should now have a project with basic files to create this app. In the root directory add a .env file. Within the file add
INSTAGRAM_API_KEY='your api key'. Don’t worry astro already created a.gitnignore filethat ignores this file so go ahead and commit your changes. -
Now we can have some fun navigate to
src/pages/index.astro -
---

---

<html lang="en">
	<head>
		<meta charset="utf-8" />
		<link rel="icon" type="image/svg+xml" href="/favicon.svg" />
		<meta name="viewport" content="width=device-width" />
		<meta name="generator" content={Astro.generator} />
		<title>Astro</title>
	</head>
	<body>
		<h1>Astro</h1>
	</body>
</html>
Within the --- --- we’re going add our sever side code. Astro JS wil the code inside of there once for every page load.
-
const response = await fetch(
  `https://graph.instagram.com/me/media?fields=id,username,media_url,media_type,timestamp,caption,permalink,thumbnail_url&access_token=${
    import.meta.env.INSTAGRAM_API_KEY
  }`,
);

const data = await response.json();
const IMG = data["data"];
this will fetch the data we need from the user’s account notice the fields option in the url it has a comma separated list asking for the id, username, media_url, media_type, timestamp, caption, permalink and thumbnail_url. This will be returned for every instagram post here’s and example of what that would look like:
{ “id”: “17895695668004550”, “media_type”: “IMAGE”, “media_url”: ”https://fb-s-b-a.akamaihd.net/…”, “username”: “jayposiris” “timestamp”: “2017-08-31T18:10:00+0000” }The
import.meta.env.INSTAGRAM_API_KEYwill be filled in with the api key we setup in the .env file to learn more about how this works see Using environment variables. -
Now that we have the data lets do something with it in the body tag add this code
{ IMG.map((el) => ( <div> {el.media_type == "IMAGE" ? ( <img src={el.media_url} alt="" /> ) : ( <video poster={el.thumbnail_url} controls playsinline preload="none" > <source src={el.media_url} type="video/webm" /> <source src={el.media_url} type="video/mp4" /> </video> )} <a href={el.permalink}> <div> <span>{el.caption}</span> <span>{new Date(el.timestamp).toDateString()}</span> </div> </a> </div> )); } -
Now, we should have everything setup run
npm run devthis will start the project in a local host in your browser navigate tohttp://localhost:4321/. If everything worked correctly you should see images or videos! Next I will explain the code and after which you can style and continue your project however you like. -
In the code we run through the data that’s returned and with the Map function creates a new array populated with the results of array it was previously called on. That’s useful for us because we want to display the contents of the array.
-
To make sure we keep our webpage semantic we use the terneary operator to check wether its an image or video and display it using a
imgtag or avideotag. -
We grab the content of each post by using the
.which allows us access the properties within each post like the caption, media_url, and timestamp.
-
-
Now we have a fully working application that is poorly styled, but it works! Next you can deploy this project to using something like Netlify. To use the full capabilities of the api visit the facebook docs. Happy coding!